
What Does This Article Cover?
- What is a Container and Container Image?
- What HighByte provides
- Getting the image
- Example commands
- Anatomy of docker run command
- Docker Compose
- Recommended Ports to Map
- Environment variables
- Resource limits
- Makeup of the Container Image
- Startup script (start.sh) environment variables
- Adding custom JVM options
- Other handy commands for interacting with the Container
- Beta versions
- Building your own image
- Other related material
What is a Container and Container Image?
Container
A Container is an isolated environment for running an application — separated from other processes on the host and from other containers via kernel namespaces and resource limits — while still sharing the host machine's OS kernel, unlike a virtual machine, which runs its own separate OS on virtualized hardware. This makes containers lightweight and fast to start, but it's also why a Container Image must be built for the host's kernel architecture (see below).
Container Image
The Container Image defines the makeup of the Container, including the CPU architecture it can run on, since the image's dependencies must match the host's kernel architecture (for example, x64 vs. ARM64/AArch64). HighByte publishes separate images for x64 and ARM64, so a Linux host running either architecture has a matching image available directly, without needing to build or emulate anything yourself. Container images can be pulled from a registry such as Docker Hub, or loaded into a local repository or your organization's private repository, and are then used to create Containers.
What HighByte provides
HighByte publishes official Docker images, highbyte/intelligence-hub, on Docker Hub, built on an Ubuntu base with Eclipse Temurin OpenJDK 25 (LTS). Separate images are published for x64 and ARM64 (AArch64) Linux — previously only an x64 image was provided, so an ARM64 host meant building your own image, but an ARM64 image is now published as well and building your own is no longer necessary. Check Docker Hub for the current tag(s) for each architecture.
Users are still welcome to build their own container images tailored to their unique deployment or security requirements — for example, incorporating third-party JavaScript libraries or applying additional network hardening. See Building your own image below.
Beta/pre-release builds are not published to Docker Hub — see Beta versions.
Getting the image
Pull the image directly from Docker Hub:
> docker pull highbyte/intelligence-hub:latest Because the latest tag is cached locally once pulled, Docker will keep reusing that cached image on subsequent docker run commands even after a newer image has been published under the same tag. To make sure you always run the current image, add --pull always to your docker run command:
> docker run --pull always ... This tells Docker to check Docker Hub for a newer image matching the tag before starting the Container, rather than relying on whatever was last pulled.
Example commands
Following are some commands that may be useful when working with the image. The Docker container runtime engine should be installed first.
You can run the following to see a list of images stored locally:
> docker image ls 
Then create and run a Container from the image. This example accepts the EULA, mounts a volume for /appData (required — see Volumes and /appData below), and maps the port used to access the Intelligence Hub UI from the host:
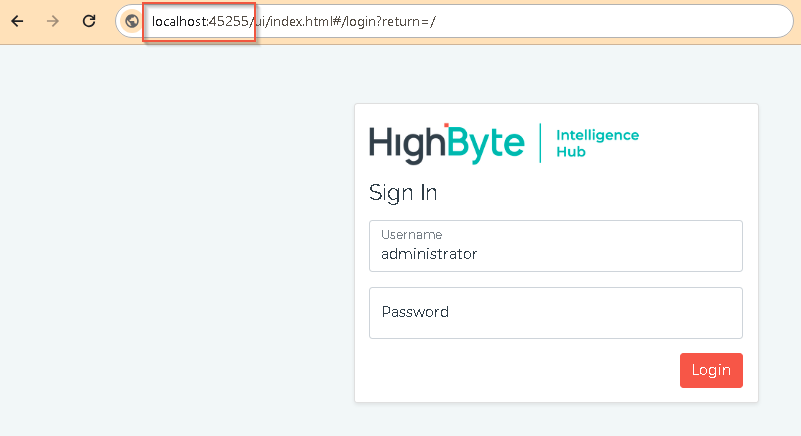
> docker run --pull always -e ACCEPT_EULA=Y --mount source=hb_vol,target=/usr/local/highbyte/appData -p 45255:45245 --name highbyte highbyte/intelligence-hub:latest Then browse to the specified port 45255 in a browser on your host:
Anatomy of docker run command
Additional flags can be added to access other network services, specify a name for the Container, specify a name for the persistent volume, etc.
> docker run --pull always -p 45255:45245 -p 1895:1885 -p 8895:8885 --name highbyte400 -e ACCEPT_EULA=Y --mount source=hb_vol_400,target=/usr/local/highbyte/appData highbyte/intelligence-hub:latest Breakdown of the above command:
> docker run \ --pull always \ -p {external port for Intelligence Hub UI}:{internal port, default 45245} \ -p {external port for MQTT server}:{internal port, default 1885} \ -p {external port for REST Data API / MCP / I3X}:{internal port, default 8885} \ --name {choose name for the container} \ -e ACCEPT_EULA=Y \ --mount source={name for persistent volume on host}, target=/usr/local/highbyte/appData \ {name of image}:{image tag} --pull always re-checks Docker Hub for a newer image before starting the Container. ACCEPT_EULA=Y is required — the Container will not start without accepting the license. The --mount (or -v) flag targeting /usr/local/highbyte/appData is also required in practice: the Container's entrypoint always attaches a volume to that path, and if you don't name one yourself, Docker creates one with a randomly generated name that you won't be able to reliably reattach later.
Docker Compose
To automate the creation and starting of containers, a docker compose file can be used. Docker compose files are often used to provide instructions for making many docker containers at the same time — usually with interconnecting references to one another — but they can also be a convenient method of assembling, storing, and launching configuration for a single container. By default, docker compose reads a file named docker-compose.yml for its configuration. Here is an example:
services: highbyte: image: highbyte/intelligence-hub:latest pull_policy: always container_name: highbyte environment: - ACCEPT_EULA=Y volumes: - /home/highbyte/localAppData:/usr/local/highbyte/appData mem_limit: 4g network_mode: host restart: always pull_policy: always is the compose equivalent of --pull always. mem_limit caps the memory available to the Container — this is important any time you're running more than one Intelligence Hub Container on the same host; see Resource limits below for why.
Once defined, navigate to the same folder that contains the docker-compose.yml before running compose commands:
— create container docker compose create — start container docker compose start — stop container docker compose stop — remove container docker compose down restart: always causes the container to be restarted automatically if the host OS restarts, provided the container had already been created and started beforehand.
Recommended Ports to Map
The REST Data API, MCP server, and I3X are all served from the same port, differentiated by path: 8885/data, 8885/mcp, and 8885/i3x. The previous separate default MCP port is no longer used.
| Port | Purpose |
|---|---|
| 45245 | User Interface |
| 1885 | MQTT Broker |
| 8885 | REST Data API (/data), MCP Server (/mcp), I3X (/i3x) |
| 9001 | Webhook Port |
| 9464 | OpenTelemetry Prometheus scrape endpoint — only active if OTEL_PROMETHEUS_PORT is set; see Observing HighByte Intelligence Hub with OpenTelemetry |
Environment variables
- ACCEPT_EULA — required. Set to
Yto accept the HighByte End User License Agreement; the Container will not start without it.
> docker run -e ACCEPT_EULA=Y -p 45245:45245 --name highbyte highbyte/intelligence-hub:latest - Deployment-specific variables — passed into the container environment:
> docker run -e ACCEPT_EULA=Y -e PUBLIC_Site=Portland -e PUBLIC_Area=Brewery -p 45245:45245 --name highbyte highbyte/intelligence-hub:latest - Time zone — use
TZ:
> docker run -e ACCEPT_EULA=Y -e TZ=America/Chicago -p 45245:45245 --name highbyte highbyte/intelligence-hub:latest Check Docker Hub for available version tags if you need to pin to a specific version instead of latest.
Resource limits
- Java runtime memory — the JVM's max heap size defaults to 25% of the memory visible to the Container. If no memory limit is set on the Container itself, that defaults to 25% of the entire host's memory — which is a problem if you're running more than one Intelligence Hub Container on the same host, since each JVM may size itself as though it alone can use a quarter of the host's memory. Always set an explicit memory limit on every Container when running multiple Containers on the same host (
--memoryondocker run,mem_limitin docker compose), so each JVM sizes its heap correctly relative to what's actually available to it. You can also override the heap size directly:
> docker run -e ACCEPT_EULA=Y -e JAVA_TOOL_OPTIONS="-Xmx4g" -p 45245:45245 --name highbyte highbyte/intelligence-hub:latest - Container resources — specify CPU and memory allocation directly. The following sets CPU to 50% and memory to 2GB, with 512MB of memory-swap:
> docker run --cpus=0.5 --memory=2g --memory-swap=512m -e ACCEPT_EULA=Y -p 45245:45245 --name highbyte highbyte/intelligence-hub:latest The docker compose equivalent is mem_limit (and cpus):
services: highbyte: image: highbyte/intelligence-hub:latest mem_limit: 2g cpus: 0.5 Makeup of the Container Image
The HighByte-provided image is built on Ubuntu with Eclipse Temurin OpenJDK 25 (LTS). Inside the Container, HighByte's files live under /usr/local/highbyte:
/usr/local/highbyte/appData— persisted application data and configuration (see /appData below)/usr/local/highbyte/runtime— the Intelligence Hub backend runtime, includingentrypoint.sh, which is the Container's entrypoint and callsstart.shto launch the Intelligence Hub process/usr/local/highbyte/configuration— the frontend configuration GUI
The Container runs as the non-root highbyte user, which owns and has access to the /usr/local/highbyte directory tree.
Startup script (start.sh) environment variables
entrypoint.sh calls /usr/local/highbyte/runtime/start.sh to launch the Intelligence Hub process (see Makeup of the Container Image above). In addition to ACCEPT_EULA, start.sh reads the following environment variables:
OpenTelemetry
OTEL_COLLECTOR_ENDPOINT— attaches the OpenTelemetry javaagent and pushes metrics/logs via OTLP tohttp://<collector-host>:4318.OTEL_PROMETHEUS_PORT— exposes a Prometheus scrape endpoint at:<port>/metrics. Can be combined withOTEL_COLLECTOR_ENDPOINTfor a hybrid push+pull setup. If neither variable is set, the agent isn't attached at all.OTEL_AGENT_PROPERTIES_EXTRA— additional or overriding OTel javaagent properties, e.g.-Dotel.exporter.otlp.protocol=grpc.OTEL_RESOURCE_ATTRIBUTES— resource attributes attached to exported metrics/logs.service.name,service.instance.id,host.name,host.id, andcontainer.nameare populated automatically; any key you set here takes precedence over those defaults.OTEL_SERVICE_NAME— setsservice.name(can also be set viaOTEL_RESOURCE_ATTRIBUTES).CONTAINER_NAME— overridescontainer.name(defaults to the container's hostname).K8S_NAMESPACE_NAME,K8S_POD_NAME,K8S_POD_UID,K8S_CLUSTER_NAME,K8S_NODE_NAME,K8S_CONTAINER_NAME,K8S_POD_IP,K8S_DEPLOYMENT_NAME,K8S_STATEFULSET_NAME,K8S_DAEMONSET_NAME— Kubernetes metadata, typically populated via the Downward API; each is only added when set.
High availability
START_MODE— set toHA_INITto initialize a new HA cluster, orHA_JOINto join an existing one. RequiresHA_NODE_IDandHA_POSTGRES_URIto also be set.HA_NODE_ID— this node's identifier.HA_POSTGRES_URI— e.g.jdbc:postgresql://....
Other
DUMP_PATH— directory to write JVM heap dumps and error logs to on crash. The image sets this viaENV DUMP_PATH=/usr/local/highbyte/appDatain the Dockerfile, so by default dumps land in the same directory as your mounted/appDatavolume, and are already covered by the volume mapping described above. Override it only if you want dumps written somewhere else.
Adding custom JVM options
start.sh bakes in its own JAVA_OPTS before launching the JVM:
--enable-native-access=ALL-UNNAMED --sun-misc-unsafe-memory-access=allow -XX:+HeapDumpOnOutOfMemoryError -XX:+CrashOnOutOfMemoryError (plus the OpenTelemetry javaagent and its properties, appended when OTel is enabled per above.)
To add your own JVM options without touching this baked-in set, use the standard JDK_JAVA_OPTIONS environment variable, which the JVM picks up automatically:
> docker run -e ACCEPT_EULA=Y -e JDK_JAVA_OPTIONS="-Xmx4g" -p 45245:45245 --name highbyte highbyte/intelligence-hub:latest Note: JDK_JAVA_OPTIONS is applied before start.sh's baked-in JAVA_OPTS on the effective command line, so for any flag both sets specify, the baked-in JAVA_OPTS wins. In practice, JDK_JAVA_OPTIONS is only useful here for flags start.sh doesn't already set.
To override a flag that start.sh bakes in, either:
- Define a custom start script and override the entry point to use it instead (see Override entry point commands), or
- Set the
_JAVA_OPTIONSenvironment variable, which the JVM applies with higher precedence than explicit command-line flags:
> docker run -e ACCEPT_EULA=Y -e _JAVA_OPTIONS="-XX:-CrashOnOutOfMemoryError" -p 45245:45245 --name highbyte highbyte/intelligence-hub:latest _JAVA_OPTIONS prints a "Picked up _JAVA_OPTIONS" line to stderr on every JVM start; this is expected and harmless.
A dedicated article on tuning JVM options for the Intelligence Hub Container is planned but not yet available.
Other handy commands for interacting with the Container
Shell access
> docker exec -it highbyte400 bash - as root
> docker exec -it -u root highbyte400 bash /appData - Project configuration files and required volume
The appData directory is set to /usr/local/highbyte/appData. The image declares this path as a VOLUME, so every Container created from it always has something mounted there — if you don't specify a volume or bind-mount yourself, Docker creates an anonymous managed volume with a randomly generated name instead. Since that name is different each time, always explicitly mount a named volume (or bind-mount a host directory) to /usr/local/highbyte/appData so your configuration and data persist and can be reliably reattached to a new Container.
Consideration — dangling volumes: because a fresh anonymous volume is created any time a new Container is created (not just started) without a named mount for this path, recreating containers repeatedly — e.g. docker rm + docker run again, docker compose up --force-recreate, or an upgrade/CI script — leaves the previous anonymous volume behind with nothing referencing it. These orphaned "dangling" volumes aren't cleaned up automatically and can quietly accumulate disk usage over time, each one holding a snapshot of whatever was in /appData when it was created. Check for them with docker volume ls -f dangling=true and remove ones you no longer need with docker volume prune — but confirm first that none of them is the only copy of an /appData you forgot to name.
/storeForwardData - Store and Forward
The storeForwardData directory is also set to /usr/local/highbyte/appData by default, for simplicity. This can be changed if you want storeForwardData stored in a different location, by changing its value in intelligencehub-settings.json.
MQTT server
This service is not enabled by default. Enable via the Settings page in the UI or load a modified intelligencehub-settings.json file.
REST Data API server
This service is not enabled by default. Enable via the Settings page in the UI or load a modified intelligencehub-settings.json file.
Overriding intelligencehub-settings.json
A modified intelligencehub-settings.json file can be bind-mounted to overwrite the one embedded in the image. The readonly parameter is optional but can be useful to keep the Container's configuration consistent across restarts.
> docker run --name hb400modified_settings -e ACCEPT_EULA=Y -p 45255:45245 --mount type=bind,source=C:\HighByte\modified-settings.json,target=/usr/local/highbyte/runtime/intelligencehub-settings.json,readonly highbyte/intelligence-hub:latest Alternatively, bind-mount the modified file elsewhere and point to it with an environment variable:
> docker run --name hb400modified_settings -e ACCEPT_EULA=Y -e HIGHBYTE_SETTINGS_FILE=/usr/local/highbyte/mod/modified-settings.json -p 45255:45245 --mount type=bind,source=C:\HighByte\modified-settings.json,target=/usr/local/highbyte/mod/modified-settings.json,readonly highbyte/intelligence-hub:latest Note: when bind-mounting a host directory to a container directory, any existing contents of the container directory are overwritten.
Alternatively, load the modified file into a managed volume instead of bind-mounting to a host path:
> docker create --name hb400modified -e ACCEPT_EULA=Y -p 45255:45245 -v managed_vol400:/usr/local/highbyte/appData -e HIGHBYTE_SETTINGS_FILE=/usr/local/highbyte/appData/modified-settings.json highbyte/intelligence-hub:latest > docker cp modified-settings.json hb400modified:/usr/local/highbyte/appData > docker start hb400modified Reference: Application Settings
Running a command using the entry point
Example of running a command through the image's entry point to rotate the password of the key store. The same entry point can be used for other command-line options:
docker run --rm --env ACCEPT_EULA=Y --env OLD_PASSWORD=my_current_password --env NEW_PASSWORD=my_new_password --entrypoint java highbyte/intelligence-hub:latest -jar intelligencehub-runtime.jar rotate-password env:OLD_PASSWORD env:NEW_PASSWORD File IO
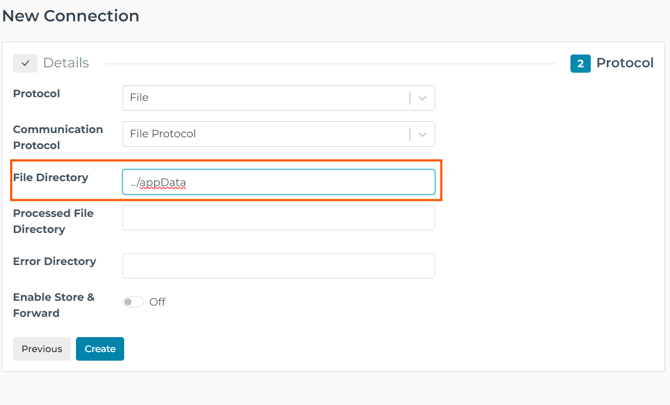
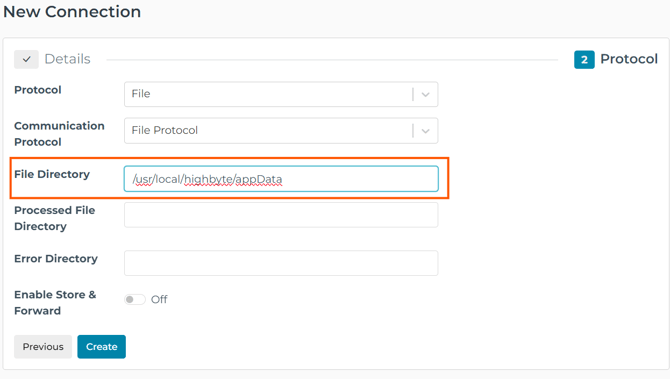
The working directory is /usr/local/highbyte/runtime. When setting up a File or CSV Connection, this is the folder paths are relative to. When writing files to the mounted volume at /usr/local/highbyte/appData, either use the absolute path or the relative path ../appData.
User permissions
The Container runs as the highbyte user (see Makeup of the Container Image). Consider bind-mounting additional host files to a directory other than /appData if you want to keep them separate from persisted application data.
Upload files from Host
- When using a Volume mount — write files with global read/write permissions by passing in a tarred file:
- as user highbyte
> tar -cf - SOURCE_DIRECTORY | docker cp -a - highbyte400:/home/highbyte/tar - as root
> tar -cf - SOURCE_DIRECTORY | docker cp - highbyte400:/home/highbyte/tar
- as user highbyte
- /expression-imports — useful for importing third-party JS libraries into the
/appData/expression-importsfolder, since npm isn't included in the image. Consider mounting/expression-importsto its own Docker managed volume, especially on Windows, for disk IO speed. The Container will need to be restarted for new JS libraries to be recognized. You can also usedocker cpdirectly and adjust file ownership afterwards:> docker cp file_to_import highbyte400:/home/highbyte/tar > docker exec -u root highbyte400 chmod 777 /home/highbyte/tar/file_to_import - When using a Bind-mount — files can be copied directly into the mapped host directory with global read/write permissions. The
readonlyparameter is optional, and prevents changes made within the Container from affecting the host files — useful for config/settings files.docker run --name hb400 -e ACCEPT_EULA=Y -p 45255:45245 --mount type=bind,source=C:/HighByte/highbyte400,target=/usr/local/highbyte/appData,readonly highbyte/intelligence-hub:latest - Consider leaving
/appDataas a Docker managed volume instead of bind-mounting, for disk IO speed. To extract a file — for example, the log file:> docker cp highbyte400:/usr/local/highbyte/appData/intelligencehub-events.log file_exported.log
Log file
Can be viewed through the browser UI; the file is located in the /appData directory.
Versioning - Image Tags
Assign tags to images to help manage multiple versions of Intelligence Hub side by side. This is most relevant for self-built or beta images loaded locally — for images pulled from Docker Hub, prefer pinning to a specific published version tag over retagging latest yourself.
> docker image tag highbyte:4.0.0 highbyte:4.0.0.456 
Networking
- Host to Container — use the external port assignments from when the Container was created, e.g. ports 8556 and 1890 for
-p 8556:8555 -p 1890:1885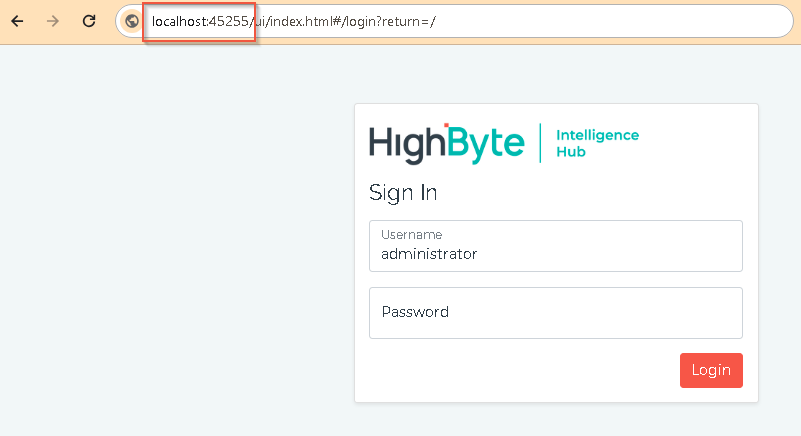
- Container to Host — use
host.docker.internalto access services running on the host machine from the container.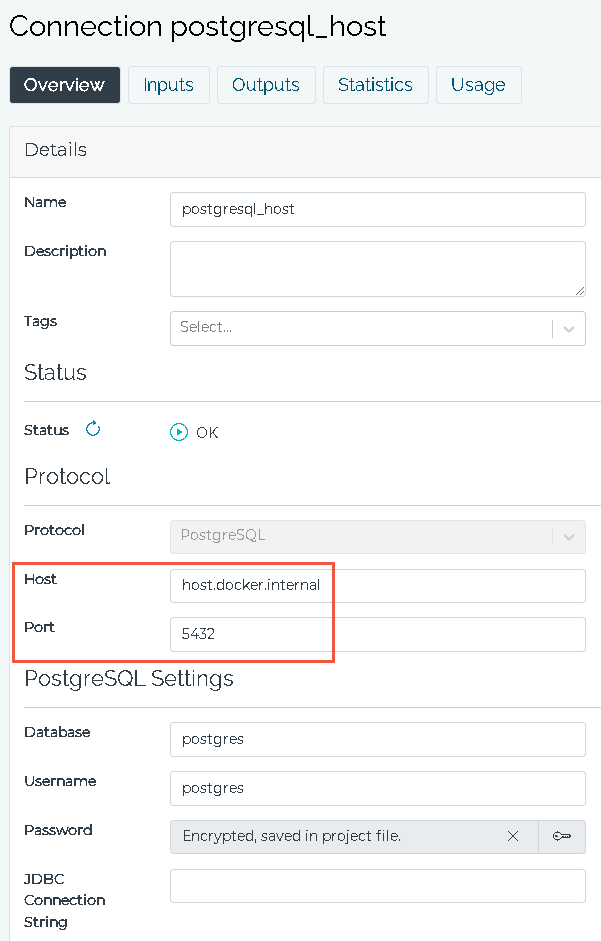
- Container to Container — find the IP address and use the internally mapped port assignment(s).
- Find the IP address on the default bridge network:
> docker network inspect bridge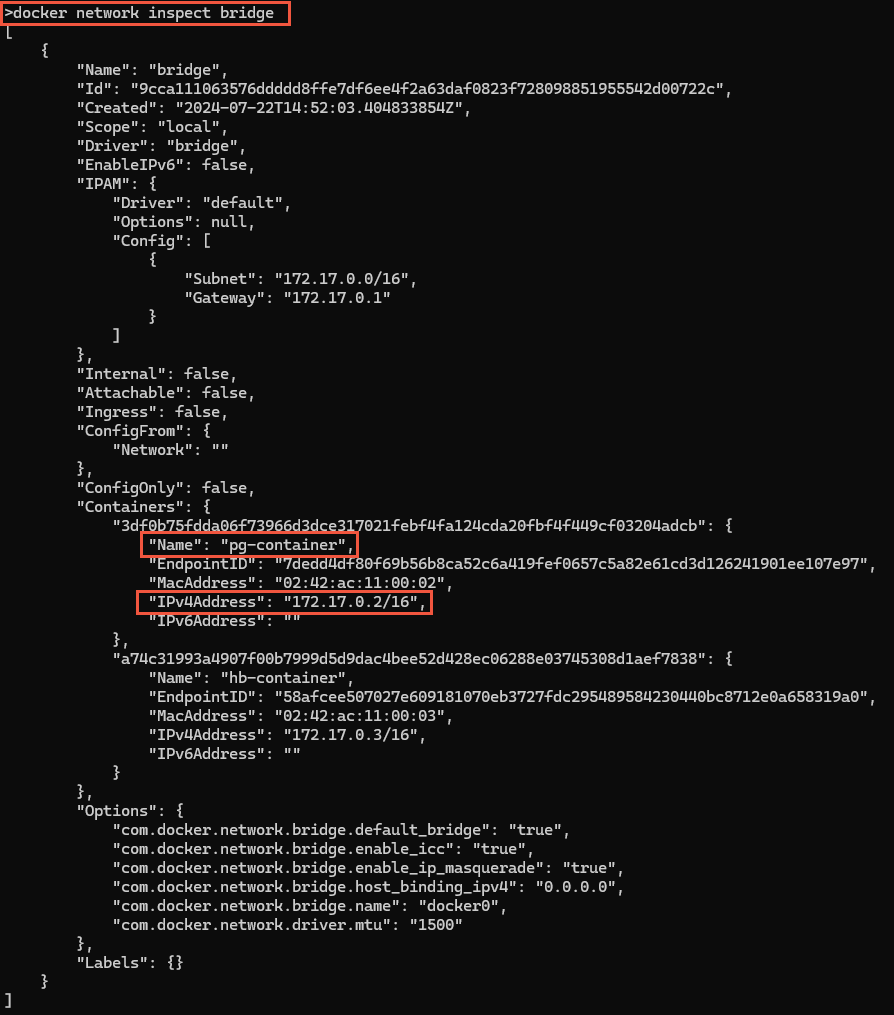
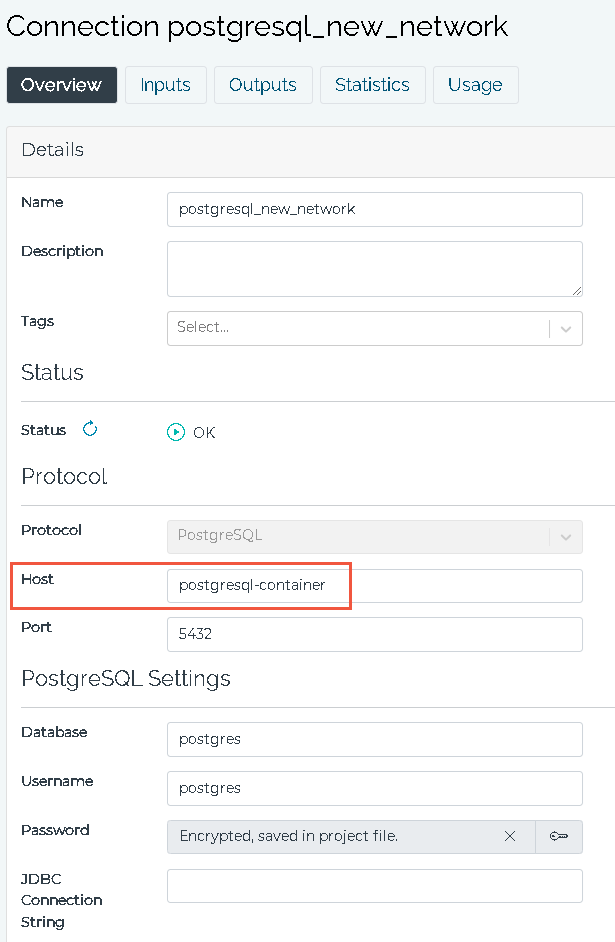
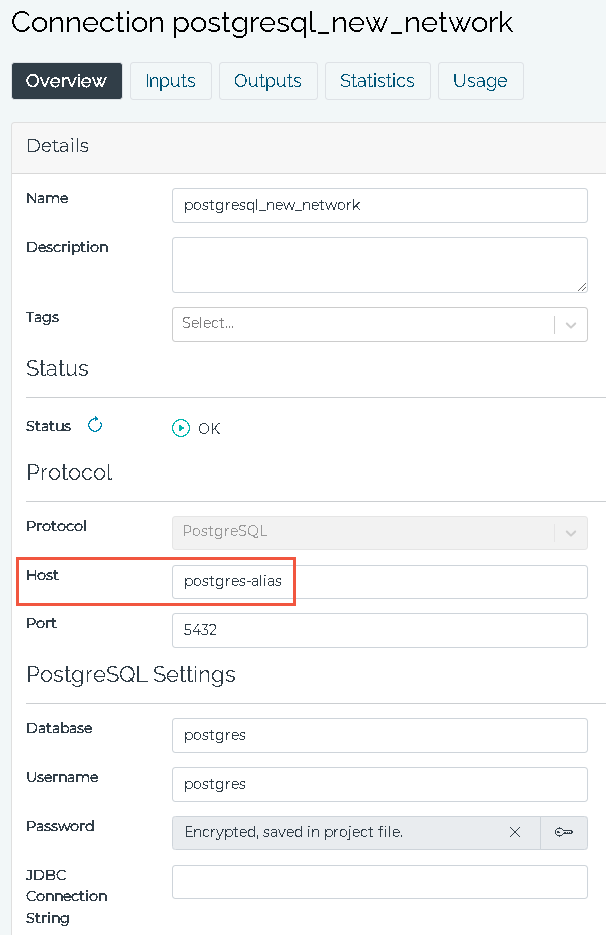
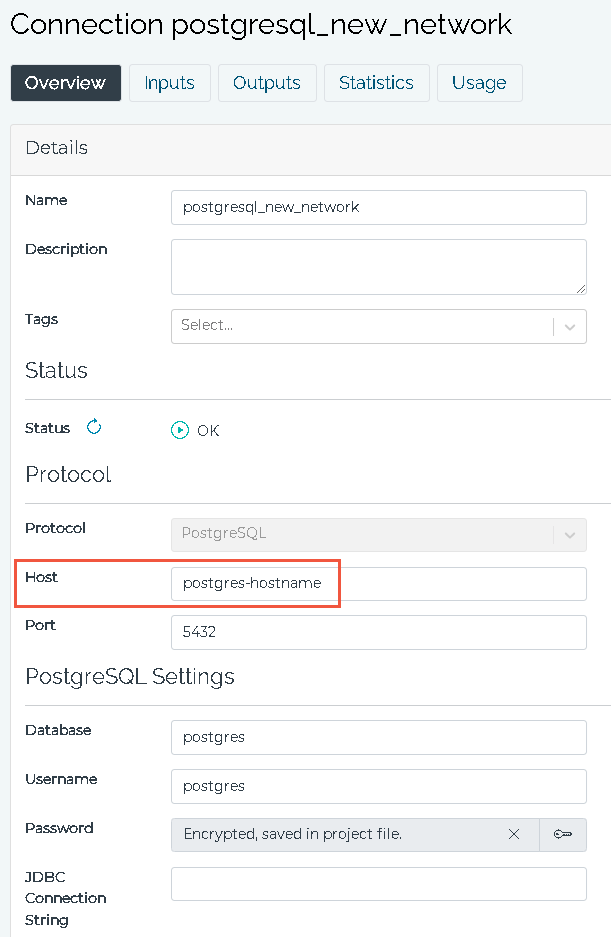
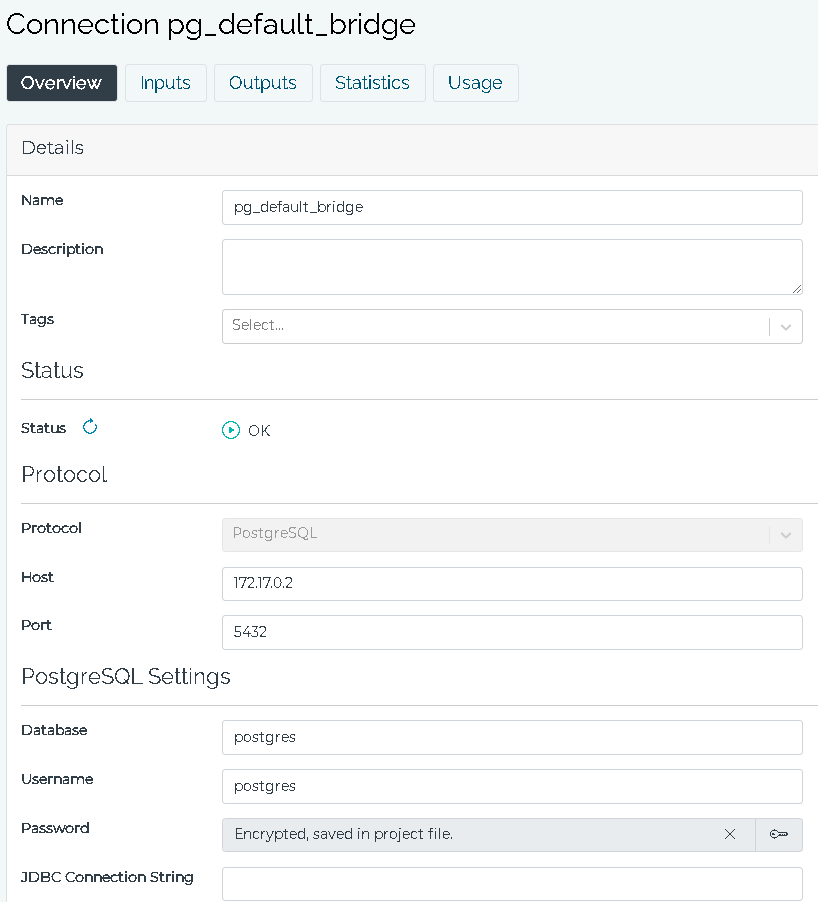 Consider creating a user-defined bridge network to group Containers that will interact with the Intelligence Hub — Containers can then be referenced by hostname, network alias, or Container name instead of by IP address.
> docker network create new_networkAdd Containers to the new network. Here we've added the
--hostnameand--network-aliasparameters. Don't include underscores in hostnames, as they are not valid.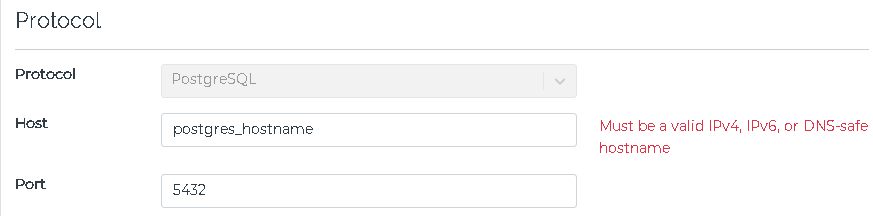
> docker run --hostname highbyte400-hostname --name highbyte400-container --network new_network -e ACCEPT_EULA=Y -p 45255:45245 highbyte/intelligence-hub:latest > docker run --hostname postgres-hostname --name postgresql-container --network-alias postgres-alias --network new_network -p 5435:5432 -e POSTGRES_PASSWORD=mysecretpassword postgres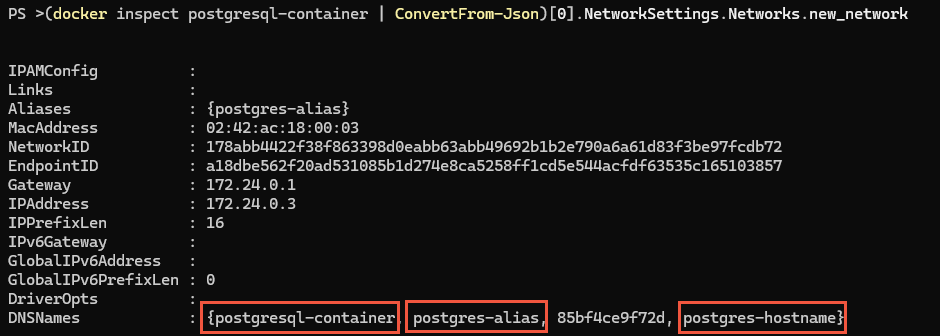
- Find the IP address on the default bridge network:
Certificates
Consider setting a hostname to fix the relationship with self-signed certificates.
Override entry point commands
If a custom .jar file must be run in the Container, one method is to bind-mount the file and then pass the java command to start the runtime.
> docker run --name hb400modjar -e ACCEPT_EULA=Y -p 45255:45245 --mount type=bind,source=C:\HighByte\jar\intelligencehub-runtime.jar,target=/usr/local/highbyte/modjar/intelligencehub-runtime.jar highbyte/intelligence-hub:latest java -cp "/usr/local/highbyte/modjar/intelligencehub-runtime.jar:/usr/local/highbyte/runtime/lib/*" com.highbyte.intelligencehub.runtime.Main start Further consideration
Consider creating a docker-compose.yml file for storing the various settings across many Containers.
Beta versions
Beta and other pre-release builds of Intelligence Hub are not published to Docker Hub. To run one:
- Download the beta Docker image
.tarfile from the HighByte portal. - Open a command line application and navigate to the folder containing the downloaded file.
- Load the
.tarfile into your local Docker image repository:> docker load -i "HighByte-Intelligence-Hub-5.x.x_Docker_Build-2026.x.x.xxx.tar" - Confirm the image was loaded:
> docker image ls - Run a Container from the loaded image as normal (see Example commands above), substituting the loaded image name/tag — e.g.
highbyte:5.x.x— forhighbyte/intelligence-hub:latest.--pull alwaysdoesn't apply to locally loaded images and can be omitted.
Building your own image
A separate ARM64 (AArch64) image is now published on Docker Hub alongside the x64 image, so you no longer need to build or cross-compile your own image just to run on ARM64. If you still have a need to build a custom image — for example, to add third-party libraries or apply your own hardening — contact HighByte Support for guidance rather than working from a generic Dockerfile sample.