Overview
Git is the standard version control system for modern software development. It makes it easy to back up your configuration, track changes over time, and deploy consistent configurations across environments. Because the Intelligence Hub’s configuration is JSON-based, Git is a natural fit for managing and controlling these files.
This article walks through three key steps:
- Backing up your current configuration with Git
- Deploying an Intelligence Hub using a saved configuration
Backing up your current configuration with Git
Let’s assume you already have an Intelligence Hub configured, or you’re building one that’s nearly ready to be backed up. The first step is to make sure you have a Git repository set up to push to. For this guide, we’ll assume you’re using GitHub.
- Launch the Intelligence Hub and navigate to Manage → Settings.
- Scroll to the Git Backup section.
- By default, Git Backup is disabled. Enable it.
- Set the Mode to Manual for now.
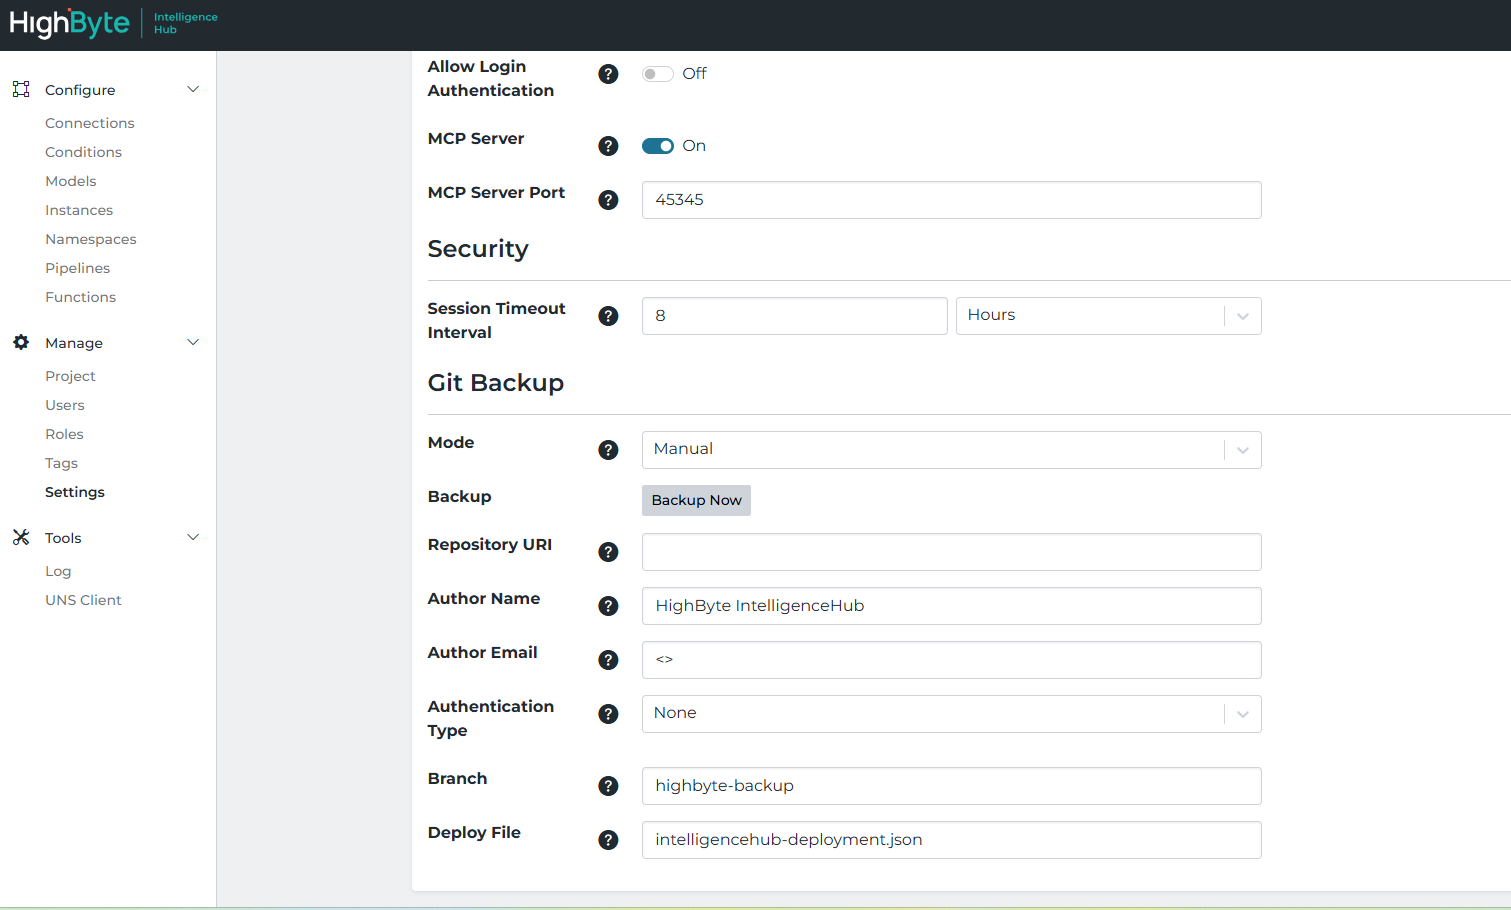
In the Git Backup section, you’ll find several configuration options. Refer to the full user guide for a description of each, but the key settings are summarized below:
- Repository URI
- The full URI to the repository to push to. Example https://github.com/myCompany/myRepo.git
- Authentication Type
- Most users will use Username/Password authentication.
- Username: Your GitHub username
- Password: A GitHub Personal Access Token (PAT) with permissions to read and write to the repository
- Most users will use Username/Password authentication.
Note: You must create a PAT in your GitHub account settings.
- Branch
- The Git branch to push changes to. If it doesn’t exist, it will be created automatically.
(Example: main)
- The Git branch to push changes to. If it doesn’t exist, it will be created automatically.
- Deploy File (optional)
- The relative path within the repository where the deployment file will be saved. Leave this as the default for now unless you have a specific structure in mind
Once you've filled in the required settings:
- Click Save to apply the changes.
- Click the Backup Now button.
- Confirm the action in the popup by clicking Backup.
This will:
- Package all configuration artifacts (including intelligencehub-configuration.json, user.json, license key and related files) into the Deploy File.
- Commit the change locally.
- Push the commit to the configured Git repository and branch.
If the backup fails (e.g. due to authentication or permission issues), an error message will appear.
On success, navigate to your Git repository. You should see a new commit in the branch containing the latest configuration. You can use standard Git tools to inspect the history and view what changed.
Congratulations, you have backed up the project.


If you select Git Backup Mode as Scheduled, you can specify a cron expression to control how often the project is backed up. When the scheduled time triggers, the Intelligence Hub checks for any configuration changes. If changes are detected, it performs a backup automatically—just like clicking the Backup Now button.

How to Deploy an Intelligence Hub Using a Git Configuration
For this step, you can use either the Git repository you pushed to in the previous step or one of the sample projects available here:
https://github.com/highbyteinc/sample-projects
With a Git repository containing an Intelligence Hub configuration ready, the goal is to start a new Intelligence Hub instance in production using that configuration. This means the hub will load its configuration directly from the repository when it starts.
To enable this, you first need to create a deployment file manually. This file tells the hub what dependencies it needs to start — in this case, the Git repository holding the configuration.
Important Note:
The deployment file contains everything needed to re-deploy the project with the exception of the intelligencehub-certificates.pkcs12. This pkcs12 file contains the AES key used to encrypt secrets in the other files (ex. intelligencehub-configuration.json). By default, the pkcs12 file is located in the /appData directory. This file must be shared with all instances that deploy the project by placing a copy in the /appData directory of the new instances.
Deployment File Creation
Create a deployment file named ‘deployment-settings.json’ and copy the contents below.
{
  "version": 0,
  "repos": [
    {
      "type": "git",
      "uri": "https://github.com/highbyteinc/sample-projects.git",
      "name": "highbyte-samples",
      "author": "",
      "email": ""
    }
  ],
  "fragments": [
    {
      "details": {
        "type": "git",
        "deployFile": "single-project/motors.json",
        "repoName": "highbyte-samples",
        "ref": "master"
      },
      "keyPaths": []
    }
  ]
}
Please refer to the full user guide linked below for detailed explanations of all options.
Below are the most important settings for this process:
- repos section
This defines one or more repositories from which the configuration is pulled. In the example below, there is a single Git repository with:- uri: The full repository URL (e.g., https://github.com/highbyteinc/sample-projects.git)
- name: A relative name used to reference this repo elsewhere in the file (for example, in the fragments section)
- fragments section
Fragments specify which parts of each repository are used for configuration. This allows a single repo to contain multiple configuration files organized by object type (e.g., Connections, Pipelines), use case, or other logical divisions. Each fragment:- References a repo by its name
- Has a type — currently, only git is supported
- Specifies deployFile — the path to the deployment JSON file within the repo
- Specifies ref — the Git branch to pull from (e.g., main)
After creating the deployment file, place the file in an application accessible location. For this example, we will use the '/runtime' application folder.
Intelligence Hub Start-up Modification
The launching method of Intelligence Hub needs modified to specify using the deployment file. This can be done by specifying it via an environment variable or using a Java property.
When the Intelligence Hub runtime starts with a deployment file, it follows this sequence:
- Loads the deployment file (i.e. 'deployment-settings.json')
- Pulls the specified fragments(s) from the configured Git repository.
- Launches the runtime using the loaded configuration.
For the following examples, it is assumed the 'deployment-settings.json' file is located in the runtime directory. Therefore, a relative path is used to provide the locations of the deployment file.
Java Property Method
Utilizing Java properties requires modification to the java command found in the default runtime startup files (i.e. start-windows.bat and start-linux.sh).
The existing java commands need modified to include the following argument.
-Dhighbyte.deployment.file="./deployment-settings.json"
Windows:
In the default Windows batch file "start-windows.bat' located in the /runtime folder, the default command at Line 49 is:
java !JAVA_OPTS! -cp "intelligencehub-runtime.jar;lib/*" com.highbyte.intelligencehub.runtime.Main start
The argument should be placed somewhere after the !JAVA_OPTS! argument:
java !JAVA_OPTS! -cp "intelligencehub-runtime.jar;lib/*" -Dhighbyte.deployment.file="./deployment-settings.json" com.highbyte.intelligencehub.runtime.Main start
Linux:
In the default Linux shell script file 'start-linux.sh' located in the /runtime folder, the default command at Line 62 is:
exec java $JAVA_OPTS -cp "intelligencehub-runtime.jar:lib/*" com.highbyte.intelligencehub.runtime.Main start
After inclusion of the argument, the java command will look like:
exec java $JAVA_OPTS -cp "intelligencehub-runtime.jar:lib/*" -Dhighbyte.deployment.file="./deployment-settings.json" com.highbyte.intelligencehub.runtime.Main start
Mac OS:
The Mac OS startup file 'start-macos.sh' utilizes the 'start-linux.sh' file. Therefore, for Mac OS, modify the start-linux.sh file as described above.
Environment Variable Method
Linux:
Here is an example of starting the hub on Linux using an environment variable.
HIGHBYTE_DEPLOYMENT_FILE=./deployment-settings.json ./start-linux.sh
Other Considerations
Version control is closely tied to CI/CD practices, and it's common to set up multiple environments—typically Development, Test, and Production.
In a standard workflow:
- Changes are made and tested in Development.
- Once validated, they are pushed to a shared Git repository.
- These changes are then deployed to Test for further validation.
- After approval, they are deployed to Production.
This promotes consistency, traceability, and reduced risk when introducing changes.
For simpler scenarios, it’s not uncommon to make changes in Prod. In these cases, it’s good practice to configure Production with Scheduled Git Backup. This ensures that any changes made in the live environment are automatically pushed back to the repository, keeping the repo in sync and avoiding configuration drift.